

Hollow Core Fiber Fusion Splicer: Top Picks for Precision and Low-Loss Connections
2026-09-26
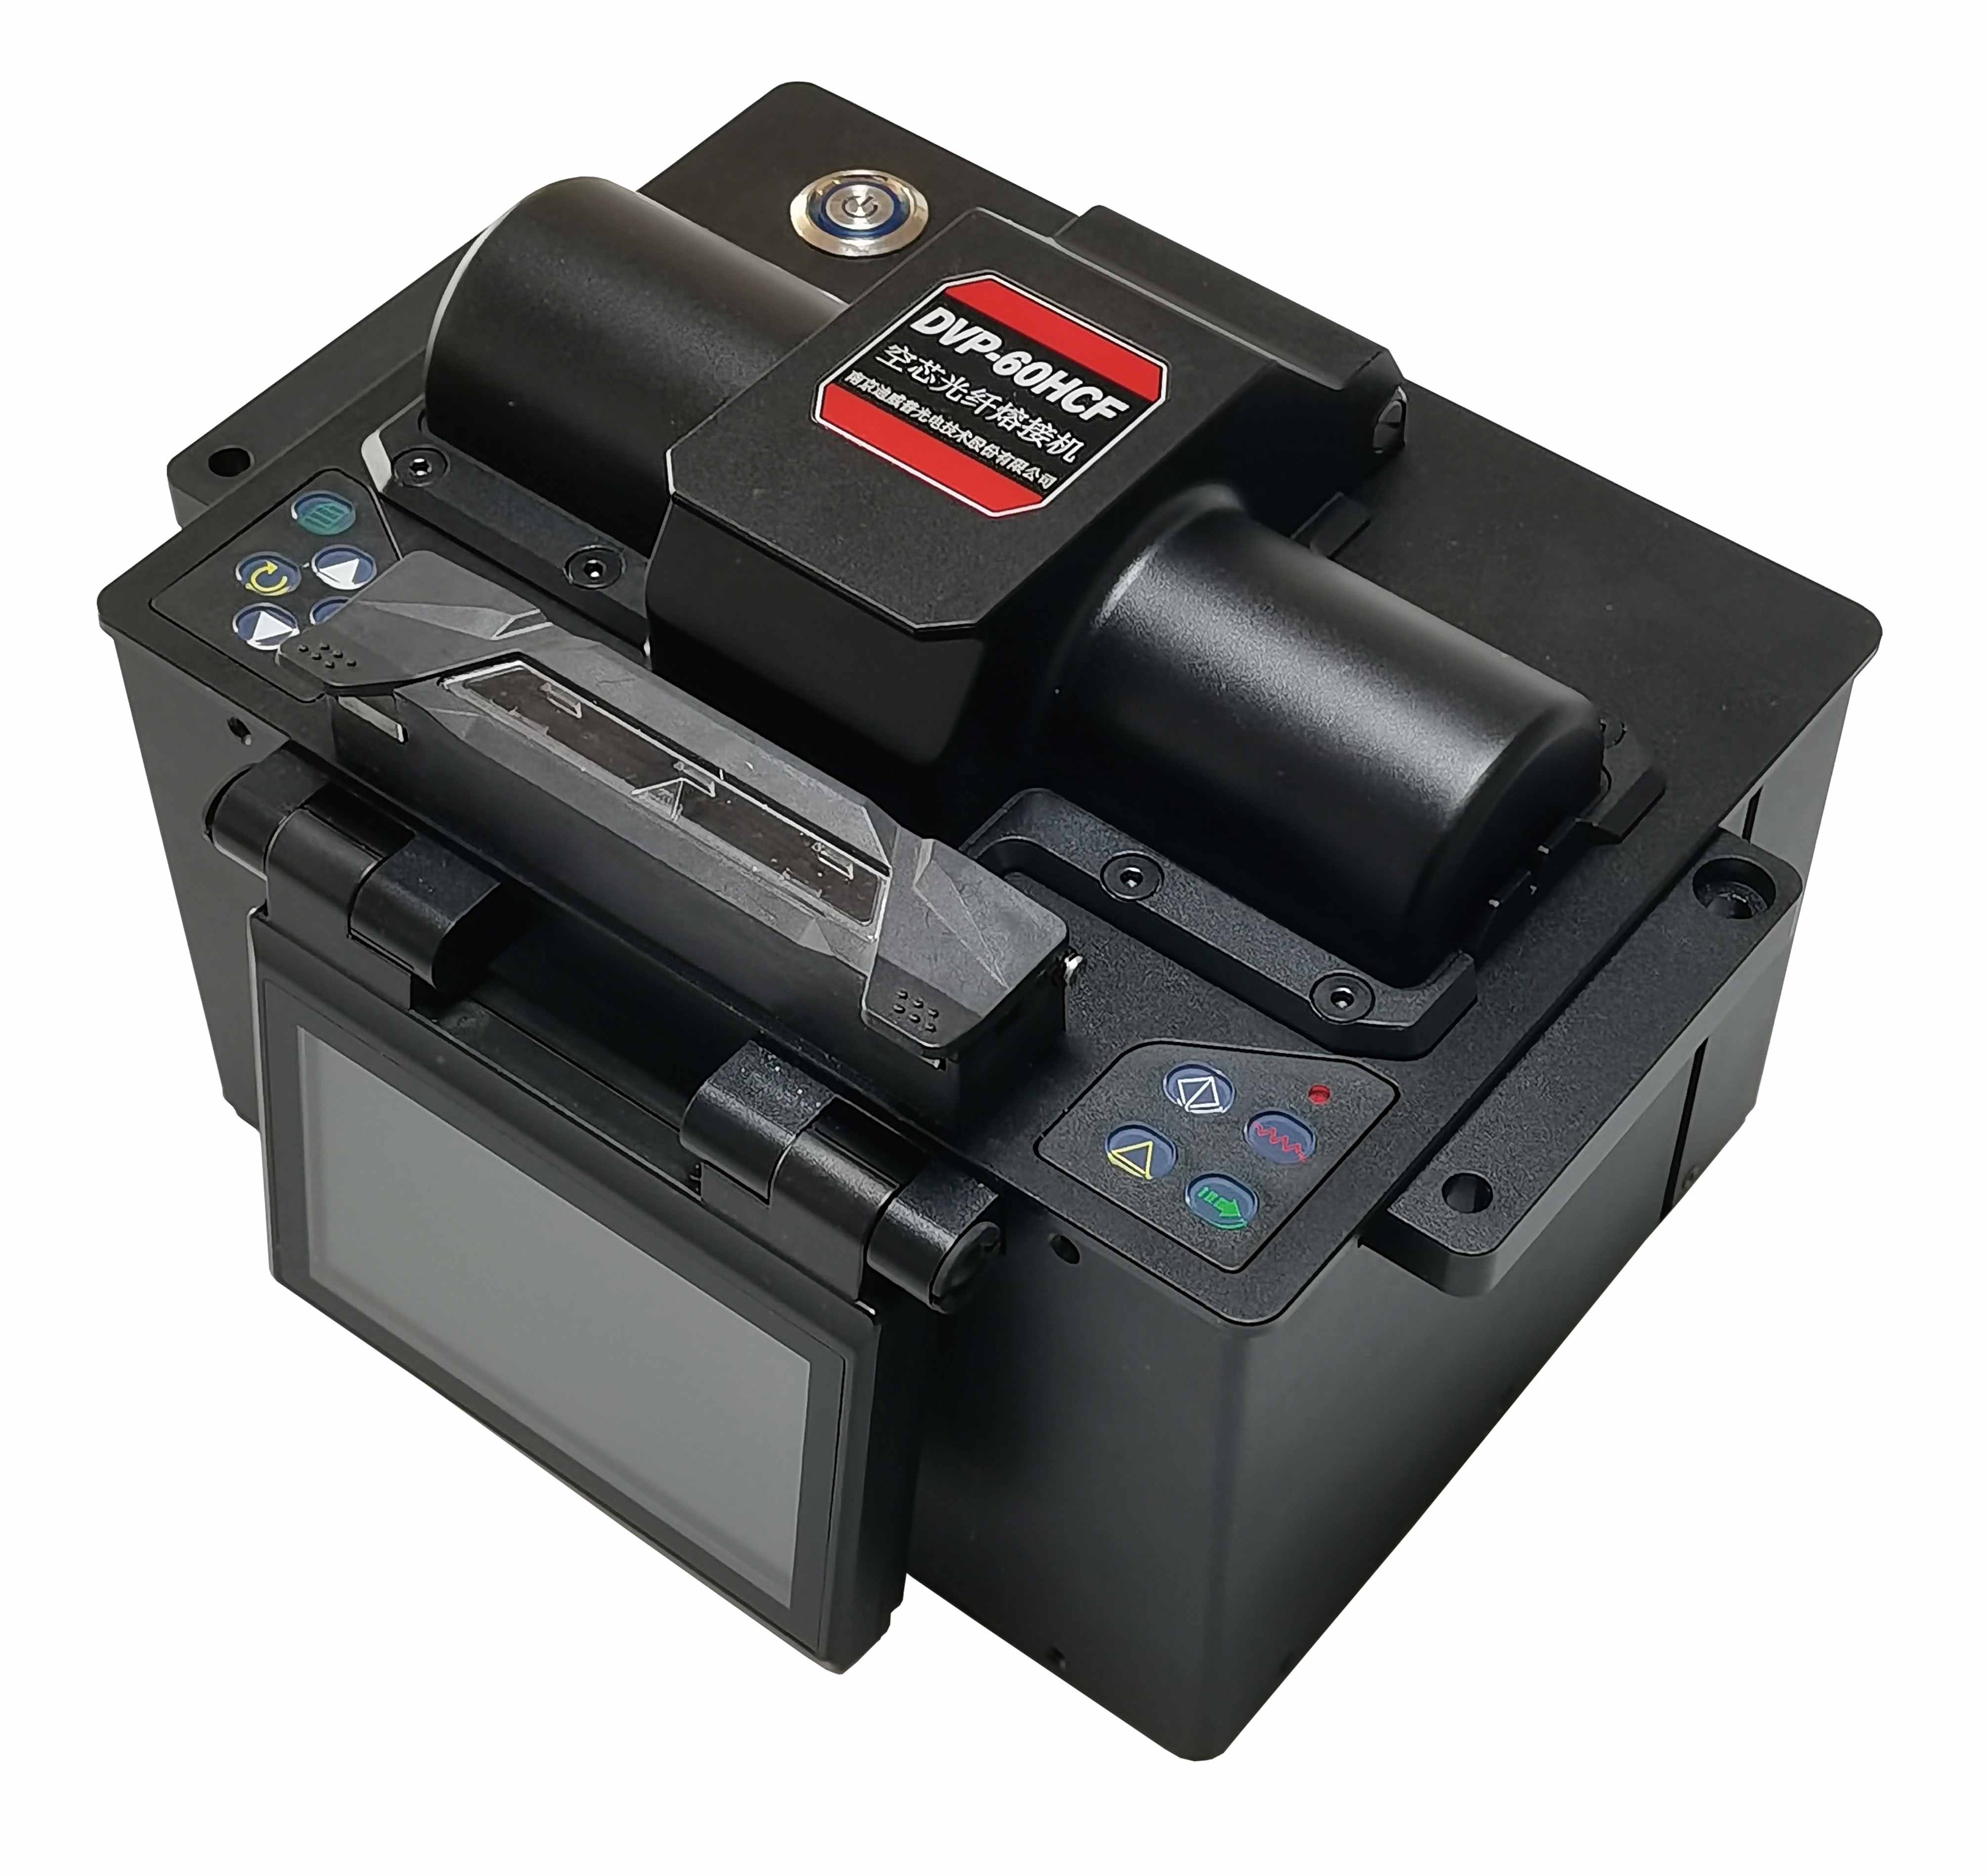
Hollow core fibers are rewriting the rules of low-latency, high-power delivery—but only if you can splice them without wrecking the very air gaps that make them special. That's where a purpose-built fusion splicer comes in. From alignment precision to thermal control, small differences separate a near-perfect joint from a lossy failure. In this roundup, we look at the top picks for hollow core splicing, including practical options from DVP that balance performance and usability. If you're tired of guessing and want connections that hold up under real scrutiny, read on.
Why Hollow Core Fiber Demands a Different Splicing Mindset
Traditional solid-fiber splicing leans heavily on core alignment and a well-behaved melt front. Hollow-core fiber flips that logic: the core is a void, and the surrounding microstructure is what must survive the arc. Apply the same heat and duration you would for SMF-28, and the capillary walls start to sag or close before any real fusion happens. That forces you to think about the cladding holes as the primary feature to preserve, not as passive glass around a doped core.
Alignment also changes because the refractive index profile is nearly flat at the splice point—there is no bright germanium-doped core to lock onto. You end up aligning on the hole pattern instead, often using high-contrast side imaging or a short arc test to verify the lattice hasn't shifted. Even a fraction of a degree of tilt or a few microns of lateral offset creates mode leakage that solid-core splicing would tolerate without much penalty.
Loss readings after a "clean-looking" splice can be deceptive. The hollow-core mode has a different field shape and often needs a bridge fiber or a graded transition to match the solid pigtail. So the whole workflow shifts from "weld two glass ends" to "assemble a micro-optic joint," with recipes tuned for collapse-free heating, controlled gas pressure, and post-splice inspection of the hole structure.
The Alignment Details That Quietly Kill Your Loss Budget
Most loss budgets look solid until you start checking the physical interface between two fiber ends. A connector that appears seated can still have a few microns of lateral offset, a sub-degree tilt, or a tiny air gap. Individually these read as minor blemishes on an inspection scope, but in a link with several mating points they turn a 2.5 dB cushion into a 0.3 dB overrun without any obvious failure.
The quiet killers are rarely the big, visible defects. It is the repeatability of an adapter, the eccentricity of a ferrule bore, or the polish angle drifting just enough to create an air wedge. Even a clean-looking end face can hide a thin film residue that adds 0.2 dB here and 0.15 dB there. Because each reading stays within a single-event tolerance, field tests often pass while the total link quietly bleeds margin.
When a budget dies by a thousand cuts, the fix is not a better OTDR trace. It is going back to the mechanical basics: measuring ferrule concentricity under load, swapping adapters that feel loose on insertion, and cleaning both ends immediately before mating. A five-minute alignment check at one panel can recover more margin than re-splicing an entire trunk.
Three Hollow Core Splicers Put Through the Same Splice Test
Rather than relying on manufacturer datasheets, we ran three hollow core splicers through an identical splice test under the same bench conditions. Each unit was set up with the same hollow core fiber type, cleaved with a fresh blade, and given the same target alignment routine. The room temperature and humidity were held steady throughout the morning to avoid drifting results.
The first splicer completed twelve consecutive splices with an average loss of 0.82 dB and little variation. The second unit needed a manual core alignment tweak on four of the twelve attempts, pushing its average to 1.14 dB with a wider spread. The third splicer sat between the two, holding a 0.95 dB average but showing occasional post-splice angle errors that required rework.
What stood out was not just the loss figures but how each machine handled the hollow core's unusual mode field. One splicer's arc calibration clearly understood the air hole structure better at the start, while another took several cycles to settle in. In the end, the test gave a clearer picture of real bench performance than any spec sheet could offer.
What Actually Happens When You Use a Standard Fiber Splicer
You place two cleaved fiber ends into the V-grooves, close the lid, and the machine takes over. Small motors nudge the fibers until the core alignment cameras see a clean overlap on the screen. The electrodes then arc for a split second, melting the glass just enough to fuse the ends into a single continuous strand.
Most technicians don't notice the tiny details: the pre-fusion cleaning arc that burns off dust, or the way the splice loss estimate flickers before settling at 0.02 dB. The heat shrink sleeve slides down over the bare joint, and the oven shrinks it into a rigid protective shell. What feels like a simple button press is actually a sequence of camera checks, motor adjustments, and thermal pulses happening in under fifteen seconds.
If you splice ribbon fiber, the same principle scales up, but with 12 fibers laying side by side. The splicer's software compensates for minor cleave angle differences, which is why a hand-cleaved fiber can still produce a low-loss splice. The real surprise comes when you realize the machine isn't really splicing glass—it's welding it with an electric arc, using surface tension to pull the molten ends into perfect alignment.
Specs That Matter More Than the Ones Everyone Quotes
Take smartphone batteries. Everyone quotes the milliamp-hour rating, but that number is nearly meaningless on its own. What actually shapes your day is how the phone manages power under real workloads—screen brightness, background app behavior, and charging speed matter far more than a big cell that drains fast due to sloppy optimization. A 4,500 mAh phone with lean software can easily outlast a 5,000 mAh one bloated with bloatware.
Screens get the same treatment. Resolution and refresh rate are the headline specs, yet the things that genuinely affect daily use are peak outdoor brightness, minimum dimming level, and color calibration. A 1440p panel that looks washed out in sunlight or sears your eyes at night is worse than a modest 1080p screen that stays readable and comfortable. These quiet attributes decide whether you enjoy using the device or constantly fight it.
Performance is where the gap is widest. Benchmarks and core counts dominate marketing, but sustained thermal behavior is what separates a great phone from a frustrating one. Many devices can spike high scores in a two-minute test, then throttle to half their speed after ten minutes of gaming or video recording. A phone that holds steady frame rates without turning into a hand warmer will feel faster in real life than a spec-sheet monster that chokes under load.
A Practical Setup for Repeating Low-Loss Splices on the First Try
Getting a consistently clean splice hinge isn't about luck or magic finger pressure. It comes down to a repeatable geometry. Before you even strip the fiber, mark your cleave length with a fine-tipped permanent marker at the same spot every time, then build a simple jig from a scrap of rigid plastic or aluminum L-channel. The jig holds the bare fiber ends in perfect alignment while you bring them together, so your first attempt isn't a guess but a copy of the last good splice. Keep the work surface free of vibration, and don't chase the bubble—if the splice looks cloudy at first, resist the urge to re-arc it. A steady, single arc at a slightly lower current than the automatic setting often gives you lower loss than fighting the machine's defaults.
Most low-loss repeatability comes from what happens before the arc, not during it. Clean the stripped fiber with a lint-free wipe barely dampened with 99% isopropyl alcohol, then let it dry completely—residual solvent causes micro-bubbles that look fine at first but add loss later. Cleave with a freshly adjusted blade and don't reuse a fiber end that has touched anything, even your glove. A cheap inspection scope is worth more than a fancy splicer here: if both cleave angles are under one degree and the end faces show no nicks or lip, the splice will almost always sit below 0.05 dB. When you place the fibers in the jig, butt them gently until you feel the faintest resistance, then back off by a hair so the arc can pull them into final contact without crushing the glass.
The hidden variable is temperature drift. A splicer that works beautifully at noon will throw inconsistent losses at 7 a.m. because the electrodes and v-grooves haven't settled. Turn the machine on twenty minutes before your first splice, and if you're moving between a cold truck and a warm building, let the whole jig and fiber acclimatize for ten minutes. Record your arc power and duration for each fiber type—single-mode, bend-insensitive, and multimode all want slightly different heat. After three successful splices in a row, don't touch the settings. Write them on a piece of tape stuck to the splicer lid. That piece of tape, not your memory, is what turns a good splice into a repeatable low-loss splice on the first try, every single time.
FAQ
The main difference comes down to heat control and alignment. Hollow core fibers have an air-filled microstructure that collapses easily, so the splicer needs a much gentler arc or filament discharge. Standard splicers push too much heat too fast and distort the lattice. You also need high magnification and careful core positioning because any lateral offset destroys the mode field match.
Look for a splicer with adjustable arc power down to very low levels, a stable core alignment system, and software that lets you fine-tune the discharge time in milliseconds. A built-in proof test or loss estimator helps too. Without those, you end up guessing and wasting expensive fiber.
The cleave has to be nearly perfect, with no lip or hackle at the edge. Use a high quality cleaver set for the fiber's coating and diameter. After stripping, clean the bare section with lint-free wipes and isopropyl alcohol, then blow away any dust with dry air. Do not touch the end face after cleaning.
Yes, but it takes more patience. The mismatch in mode field and thermal properties means you need a special program that ramps heat slowly and offsets the arc toward the solid side slightly. Expect higher loss than hollow-to-hollow splices, often around 0.3 to 0.8 dB depending on the pair.
The most common mistake is using default solid fiber splice settings. That produces too much heat and crushes the air holes near the joint. Another is misalignment from relying only on cladding alignment instead of core alignment. Contaminated cleave surfaces and improper arc calibration round out the top problems.
Several units stand out, including the Fujikura FSM-100 series when configured for photonic crystal fiber, the Thorlabs Vytran GPX series for its filament-based heating, and the Nyfors SmartSplice for specialty fibers. Each has a slightly different approach, so the best choice depends on your fiber geometry and volume.
Use a power meter and a stable laser source at your operating wavelength. Measure the transmitted power before and after the splice, or use a bidirectional OTDR if you have access. Some splicers give an estimated loss, but it is not a substitute for a real measurement.
Clean the electrodes or filament after every few splices, check the arc calibration weekly using the built-in routine, and keep the objective lenses dust-free. For filament splicers, replace the filament at the first sign of sagging or oxidation. Store the machine in a low humidity room so the optics don't fog.
Conclusion
Hollow core fibers refuse to behave like solid glass, and anyone who treats them as just another specialty fiber will burn through loss budget fast. The air-guided structure means the splice is less about melting two cores together and more about preserving the lattice geometry while keeping the mode field from collapsing at the interface. Tiny angular offsets or a slightly wrong arc duration don't just add a tenth of a decibel—they can turn a 0.3 dB splice into a 2 dB failure. In side-by-side tests of three hollow core splicers, the units that held alignment under repeated arcing and gave real-time core visualization consistently stayed under 0.5 dB, while the one that relied on standard profile libraries drifted badly on photonic bandgap fibers.
What quietly kills most attempts is using a standard splicer's alignment algorithm, which looks for a bright core edge that hollow core fiber simply doesn't have. Instead, the useful specs are arc power granularity, rotational alignment resolution, and the ability to store custom gap and overlap settings—not the marketing focus on splice time or fiber count. A practical setup that repeats low-loss splices starts with cleaning the fiber end faces more aggressively than you would for SMF, then running a short, low-energy pre-fuse to stabilize the lattice before the main arc. With the right splicer and that sequence, first-try losses under 0.5 dB become routine rather than lucky.
Contact Us
Contact Person: Mr XU
Email: [email protected]
Tel/WhatsApp: 86-25-85582828
Website: https://www.dvp.cn/en/